Trucks
Maintaining Your Power Take-Off
Keeping the equipment in good running order.
Mikel E. Janitz
This article is the last one in a series designed to help end users, owners and operators to plan the selection, installation, troubleshooting and maintenance of refuse vehicles equipped with power take-offs (PTO) coupled to hydraulic pumps. The series of articles covered the important, and often forgotten, topics mechanics and operators need to be familiar with and understand to get the most out of their PTO.
The first articles covered selecting a PTO and then how to troubleshoot the installation. Now that the PTO is selected and installed, it needs to operate correctly over the life of the vehicle. Proper maintenance, as well as, scheduled maintenance is required to ensure the equipment will run virtually trouble free (see Figure 1).
Initial Maintenance
Maintenance can be divided into several distinct stages. There is the initial stage, short-term stage, duty cycle stages (normal vs. severe duty), and long term and system stages. PTO maintenance coupled to axillary equipment (for example extended shafts, pumps or drivelines) requires planning, operational expertise and system knowledge. Keep that in mind as you work to maintain the vehicle.
Prior to starting any maintenance tasks, ensure the vehicle is stopped, the engine is off, the wheels chalked and keys in a safe and secure place. Working under a vehicle near rotating components is very dangerous. Use safe practices before any work begins and adhere to all safety warnings and precautions.
The initial maintenance can be carried out within the first 24 to 48 hours after first starting up the PTO. Once the PTO and pump have been run a short period they need to be inspected. Make note of the drive train sound, if too noisy further investigation may be required. Let the engine cool down and look for leaks. Make sure to repair leaks if any are found. Re-torque or verify all hardware and fasteners are tight and to spec. Check the transmission fluid level and fill appropriately if low. Now, verify the hydraulic fluid is at appropriate levels at this time, adjust as required. If the equipment was running as expected then that pretty, much covers the initial maintenance task.
The next stage of maintenance is the weekly review. The vehicle, at this point, has had the PTO and auxiliary equipment run for quite a while. The truck and hydraulic system has experienced its typical duty cycle multiple times. This is the ideal time to inspect the vehicle for leaks, noise and check hardware for proper torque again. By checking these things now, you can save on a lot of unexpected down time later. It is also important to listen to the PTO and transmission noise level. Listen for rattling, knocking and whining. Noise is a key indicator of maintenance needs. A loud knocking noise can be a sign of gear damage, which needs to be addressed as soon as possible.
Don’t forget to look at the indicator lights. Use the indicator lights, if so equipped, logically. If lights are illuminating unexpectedly, read the manual to determine their meaning. Use the illustrated parts sheet to determine location and possible impact. Once you are familiar with the issues, address them at this time to minimize any possible damage to the system. This is a proactive maintenance step and pays off. This will help with unexpected down time, which can be very costly.
Long-Term Maintenance
After a few months have passed, and the early stages of maintenance are behind you, the equipment operator/driver needs to think about scheduling maintenance based on the duty cycle. Duty cycles are either normal duty or severe duty. Simply put, severe duty is defined as a PTO operating more than five minutes out of every 15 minutes. Anything less than that is considered normal duty. Basing your PTO maintenance requirements upon its duty cycle is the logical choice for long-term maintenance needs. The operator knows the equipment, knows how it functions, knows how it sounds and sees the results first hand. This knowledge is invaluable when establishing a schedule with the maintenance team.
Normal duty maintenance tasks typically are established farther apart than severe duty. The harder you work the hydraulic system the more often it needs inspected. Furthermore, depending on the application and historical maintenance data the work should be adjusted to accommodate changing needs and the overall results of previous maintenance. You may find there are items needing replaced periodically or fluid levels adjusted or simply verifying hardware is tight and secure. Make a checklist for the vehicle to document and track the maintenance.
Long-term PTO maintenance should be tied to the regular maintenance suggested by the engine, transmission or vehicle manufacturer for example. The owner/operator should consider the PTO as an extension of the transmission. When fluid levels on the transmission are inspected the PTO should be reviewed. If fluid is low, add to it. Then look for any leak source and fix it promptly. Verify fasteners are torqued correctly and the unit is not leaking around the seal. If there are leaks replace seals as required. If the PTO has a cover which allows gear inspection, remove it and check the gears. Use a good bright light source for inspecting gears. Look for nicks, cracks and worn gear teeth. Replace nicked or damaged gears as soon possible (see Figure 2). It is not recommended to run equipment with bad gears.
The PTO can also be removed to inspect gears and other components. If serious defects are found, replace the bad gears and contact the manufacture for guidance if you are unsure how to proceed. Also look for shaft spline wear at the coupling of the PTO and pump. Inspect internal splines and external splines. If the splines are heavily worn it is a good idea to replace before further damage could occur. If a wet spline, look for contamination or leaking seals. Transmission fluid and hydraulic fluid should not mix. Anytime the PTO is rebuilt look at shaft surfaces for worn areas. Replace worn or scored parts immediately. It is a good practice to pack bearings with anti-seize grease if the PTO is disassembled for maintenance or repaired. First, clean the bearing and inspect it; then, grease it or replace the worn out bearing before reassembling.
Regular Maintenance
Lastly, as regular maintenance is carried out on the chassis (frame) it is a great time to inspect and maintain the PTO. In fact, anytime repairs are performed on the vehicle it is a great time to inspect the PTO and hydraulic system. At the time the chassis is being lubed, the PTO should also be lubed if so equipped. PTOs coupled directly to a pump should have their shaft cleaned, inspected and lubed to increase the life of the PTO and pump splines. Use an anti-seize grease or a high temperature, high pressure grease. About an ounce of grease will due in most cases. Clean off the zerk grease fitting after the lube is applied. This will help reduce the amount of dirt and grime collected on the equipment. (see Figure 3). Have clean equipment is a sign of good maintenance.
Keeping your PTO running and in top shape requires only simple maintenance. This can be carried out in short intervals, long term intervals, intervals based on duty cycles or based on manufacture’s recommendations. Maintenance can also be based on vehicle performance. The key is, no matter which method picked, maintenance is conducted on a routine basis with good records. Always use OEM replacement parts. Manufactures provide detailed exploded views with each item identified to ensure parts are easily identifiable and clearly noted allowing the correct part to be replaced. Lastly, keep detailed records of your maintenance. This will streamline future maintenance tasks, as well as, improve scheduling and increasing uptime. Basic maintenance conducted at regular intervals will increase the useful life of the PTO and the axillary equipment. Basic maintenance can prevent costly unscheduled downtime and unnecessary replacement of components, in turn keeping your refuse equipment in top shape and in good working order.
Mikel Janitz is the Manager of Engineering for Muncie Power Products (Tulsa, OK), a global leader in power take-offs and a worldwide organization dedicated to solving the vocational industry’s mobile power issues. Mikel graduated from Oklahoma State University with a BS and MS in Engineering and Engineering Management. He can be reached at [email protected] or visit www.munciepower.com.
Figure 1
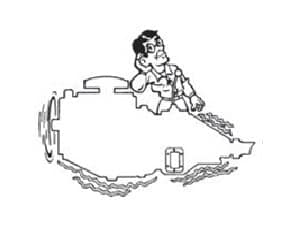
A depiction of a mechanic contemplating the maintenance on the auxiliary system.
Figure 2
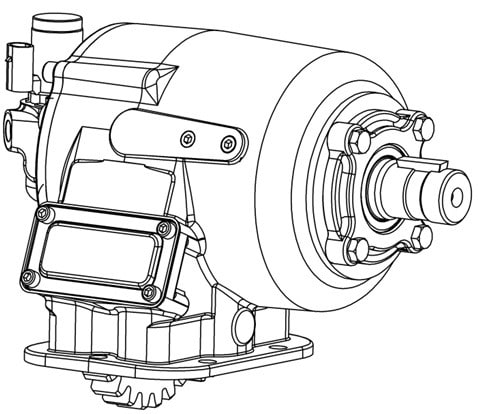
A shot of a PTO with an access panel. By removing the fasteners the inspection plate can be removed to see the internal gears. Good bright lighting is needed to inspect gears.
Figure 3
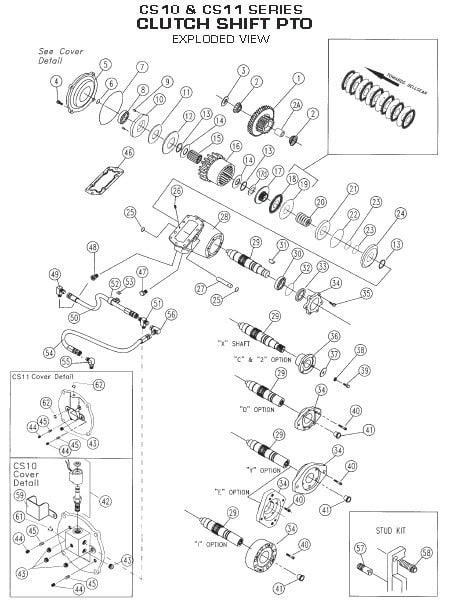
An example of an exploded illustrated parts sheet. These are great sources of information when replacing worn and damaged parts. They also show how parts go back together. Reputable manufactures have theirs up to date on their web sites.
Figures courtesy of Muncie Power Products.