Henry Purchase
Server decommissioning is a routine part of a data center’s life cycle, and it is essential to plan for this to make the process as smooth as possible. This article will cover server decommissioning best practices, how to prepare for hardware retirement and the best things to do once you have de-installed your servers.
Only 17.4 percent of e-waste was officially documented as formally collected and recycled in 2019 (Global E-waste Monitor). What you do with your servers after they’ve been decommissioned is often just as crucial as the decommissioning process itself—particularly for the environment.
Why Server Decommissioning is Necessary
Although much of the focus is on rolling out new data centres, decommissioning has always been as important. Technology is constantly improving and evolving. Given much of our data traffic passes through data centers, evolution is driven by companies who must keep up with ever-growing demand.
In a 2020 survey, 42 percent of respondents mentioned that they refreshed their data centre servers every 2 to 3 years, while 26 percent stated that they did so every year (Statista). These servers are decommissioned and replaced for many different reasons, including saving money and space, improving capacity, and co-location projects.
Co-location projects are where companies move their data centre servers to a co-location facility. This is a data center facility in which businesses rent space for servers. Typically, the co-location company will provide the space, temperature regulation, power, bandwidth and physical security, while the customer provides servers and storage.
Decommissioning also reduces the risk of server-related issues, such as power outages, leading to data loss or corruption. Server decommissioning will also help with disaster recovery planning because it will reduce the number of systems that need to be backed up and restored in an emergency.
What are the Considerations when Planning for Server Decommissioning?
Several factors need to be considered for the server decommissioning process. For example, the data stored on the hardware needs to be backed up and transferred to another device. The hardware also needs to be disposed of in an environmentally friendly way—this will likely have to be done by a third party WEEE (waste electric and electrical equipment) recycling company. There are many considerations when planning for server decommissioning, and you must take all of them into account before beginning this process.

Server Decommissioning Checklist and Best Practices in 7 Steps
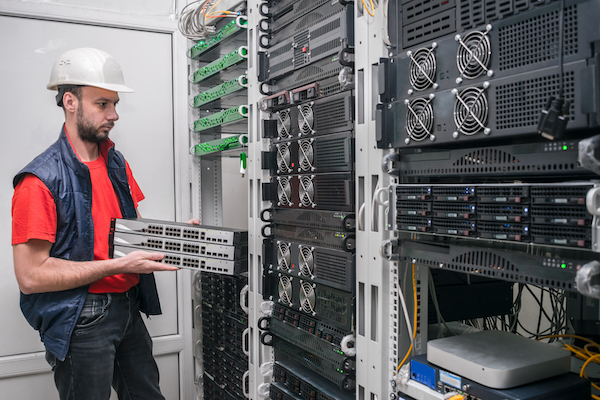
#1: Identify the Server to be Decommissioned
Locate the server that needs to be decommissioned in your facility and record all necessary information (including manufacturer, model, serial number, suite and rack, location/area etc.). It is always best for this inventory to be recorded digitally and excel or paper-based inventories only lead to problems further down the line regarding data centre decommissioning.
Taking photos of each addition to the inventory can also help when it comes to decommissioning work. Adding notes to each image allows de-installation engineers to quickly identify the right equipment—particularly important for large or old sites.
#2: Get Approval
It is always best to get approval for the decommissioning works once the inventory has been built. If the decommissioning work is being completed internally (i.e., within your company), it’s best to contact the Head of IT or Facility Manager to get this approval in writing.
If you are a 3rd party completing decommissioning work, it is best to send the inventory over to your customer, so they can double-check it against their records before approving. If they need to complete an on-site check to get approval, the images and equipment information collected in step 1 will help.
It is also essential to reach out to every department affected by the decommissioning process; for example, your accounting team will need to update the books to reflect the decommissioned equipment’s absence and account for any software licenses.
#3: Backup Your Data
You will most likely have information on the server that you need to back up and retain. Now you have approval, run tests to ensure the backup and disaster recovery processes are functioning before creating a comprehensive backup. Before moving on to decommissioning, double-check that it is all backed up.
#4: Locate and Terminate Licenses and Contracts for the Servers
The server scheduled for decommissioning will no longer need support, so any vendor maintenance is no longer necessary—go ahead and schedule the cancellation of these contracts and licenses if required.
#5: Wipe Data
Wiping data is most commonly done using data erasure software (from providers such as Blancco). Be sure to follow the instructions from the chosen tool and do not disrupt your other hardware. The main benefit of wiping data is that it is removed permanently and does not risk data security, reducing future data security issues for your business. Erasing the information is more environmentally friendly than destroying the hardware, which often requires servers going through a shredder.
Data wiping also enables the resale of assets, meaning your decommissioning project could be self-funded or, at best, generate extra revenue to reinvest into your business. Make the most of your old tech with proper disposal to avoid regulatory penalties. Partnering with experienced ITAD (IT Asset Disposal) companies will help you stay compliant and profitable. For this step, it is always best to keep a detailed, digital audit trail of the data wiping process along with a certificate of erasure—your chosen company should provide this for you.
#6: De-install and Pack Up
Disconnect firewalls, access control lists (ACLs), subnetworks, and remove the server. It may seem like a good idea to try and do everything yourself, but it can be challenging and even cause issues for other parts of your business. Leave it up to qualified experts who have been doing this for a while and know how to do things best.
#7: Reuse, Recycle or Resell
Once your servers have been wiped and decommissioned, it is now time to put them into the circular economy. This is often best done through an asset recovery company or ITAD that specializes in getting value from your redundant equipment through reselling or recycling in the circular economy.
Server Decommissioning Checklist Summary
We have put together this server decommissioning checklist to help you get started. The goal is to provide a general overview of what needs to be done, but it also serves as a great starting point for your organisation. Refer to this checklist for each phase during server decommissioning. Keep in mind that timelines and budgets can vary, so make sure to set a range while developing your plan.
Data centers get decommissioned for many reasons. One of the reasons businesses may decide to decommission their data center is the risk of having it in-house. Due to the rise of cloud computing, more and more people and companies are now storing their data in the cloud instead of onsite. These public cloud services, such as Microsoft’s Azure or Amazon Web Services, provide cheaper solutions and enhanced security—attractive to businesses, especially in the financial sector that faces stringent regulation.
For more about server decommissioning best practices and how RECOVAR digitises the whole process, from inspection to recovery, contact Henry Purchase, Co-Founder of RECOVAR at [email protected].